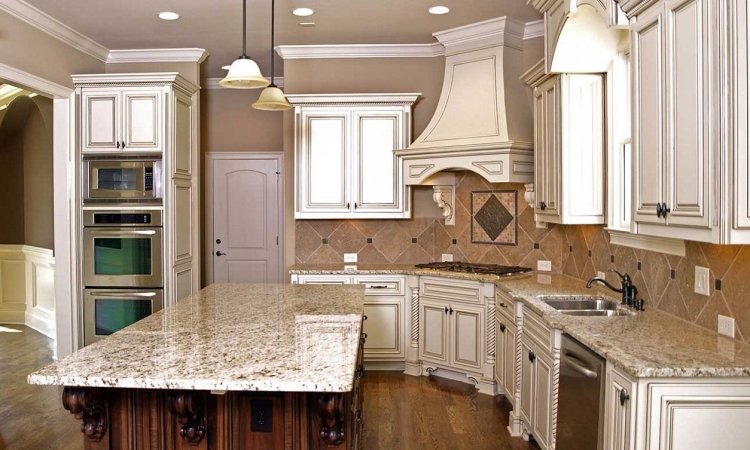
Unattractive, outdated cabinets have the capacity to make the entire kitchen feel drab and unappealing. Fortunately, painting kitchen cabinets white with glaze can drastically improve the appearance of the space. To give the room a fresh feel and to considerably brighten up the space, painting kitchen cabinets white with glaze is a budget-friendly and ideal option. The white color makes the room feel crisp and the glaze slightly tints the cabinet to provide a traditional feel with a modern twist. One of the greatest features of painting kitchen cabinets white with glaze is that it is a simple, do-it-yourself project as long as you become familiar with the steps involved.
Preparing the Cabinets

Prior to painting kitchen cabinets white with glaze, they must be properly prepared. Start out by taking off the hardware and cabinet doors and removing the drawers. Typically, kitchen cabinets have smoke and oil residue on the surface which may not be easily spotted; therefore, a degreasing cleanser should be used to thoroughly clean the cabinets. A deglosser should be used afterwards to remove any greasy residue that is lingering. When the cabinets are dry, it is time to use sandpaper on the surface so that the paint can be more easily applied. A primer should be applied before painting for best results.
Painting the Cabinets
As it relates to selecting paint for the cabinet refinishing, deciding on the right shade of white might be the first priority; however, making use of the right formula is equally important. An oil-based formula is most ideal in a kitchen since this type of paint dries to a harder finish when compared to a water-based paint; this makes it easier to clean and more durable. A foam roller can be used on the larger surface areas when painting kitchen cabinets white with glaze, but a brush should be used for any small crevices and inside edges that cannot be reached by the roller. When painting the cabinet doors, only one side can be done at a time since the paint needs at least 24 hours to dry on each side.
Glazing the Cabinets

Prior to applying the glaze, ensure that the cream base is totally dry. Even though there is an option to mix the glaze, it is typically easier to purchase a pre-mixed glaze from the local paint supply store. There is a variety of colors in which glaze is available, so go for an option that best complements the décor of the kitchen. For the kitchen cabinets, an oil-based glaze is most ideal as there will be more time to work, given that it takes a longer time to dry when compared to a water-based formula. For the initial application of the glaze, a clean rag or a brush can be used; a straight or circular motion should be used during the application. When the cabinet has been coated with glaze, use a clean rag to wipe off the excess glaze; this will give the cabinets a lightly tinted look. Starting on the back of the cabinet doors may be a good idea, since this gives an allowance for the glazing technique to be perfected before reaching the outside of the cabinets. Glaze the doors and then move on to the drawers, the bases of the cabinet should be left for last.
After painting kitchen cabinets white with glaze, it may be a good idea to add a clear topcoat. While this is not a requirement, doing so can prevent damages like scratches and help the finish to last longer. It is important to allow the glaze to completely dry prior to applying the topcoat to the cabinets.


